Showing posts with label dessert. Show all posts

Wednesday, August 4, 2010

Tight-Arse Tuesdays: How to Make Honeycomb!


I got this idea from this really awesome Australian blog, $120 Food Challenge where the woman who owns the blog is finding out how to feed her Australian family off $60 a week (quite a challenge in this country!). In it, she made honeycomb, which I have also made to chop into a homemade ice cream - if I can pry my fiance from the sugary mass in time. I have included a picture-by-picture demonstration on how to make it myself:

This is the time mise-en-place is incredibly important; have everything prepared and set aside in advance!!! You'll want: 1 tsp of bicarb, sifted twice, a prepared pan with wax paper that you've put a little extra grease on, some water, a pastry brush and a baking mitt.

In my pan I have put 250g of sugar and 250mL of water. I have placed it on a medium heat. Do not stir at this point. Wait until it starts to boil a little. If any sugar crystals form, dip the pastry brush in your water and stick it in the pot where the crystals have formed. I didn't end up with any so I skipped this step.

Once it has started boiling, whisk as much as possible. You want to incorporate as many bubbles as possible to make a nice holey honeycomb.


When it has reached this colour IMMEDIATELY take it off the fire with your oven mitt and keep whisking for a few seconds. Add the bicarb and whisk once more. The mixture will start to boil over the top (quickly!) so be prepared to suddenly dump all the honeycomb into the pan. It was so quick I didn't have time to take a photo with a prepared camera!
Wait 15 minutes. Don't touch it in this time. I did and mine flattened a little. Break up with a knife. ENJOY!


Thursday, June 24, 2010

Rosemary-Balsamic Strawberry Shortcake


So you went to the U-Pick like I suggested yesterday, right? And now you picked too many strawberries and you want a good recipe to use some of them up? Well good, because I just came up with this snazzy little number and I'm eager to share my success with you.

Oh, you will not believe how well these flavors go together!

ROSEMARY-BALSAMIC STRAWBERRY SHORTCAKE

Shortcake Biscuits:
2 cups unbleached white flour
2 Tbsp fresh rosemary, finely chopped
1 Tbsp sugar (vanilla sugar, if you have some!)
2 tsp baking powder
1/2 tsp cream of tartar
1/2 tsp salt
1/4 tsp baking soda
1/2 cup very cold butter, cubed
Generous 1/2 cup half-and-half (plus extra for brushing)

Strawberry Filling:
3 cups strawberries, trimmed and halved
3 Tbsp honey
2 Tbsp balsamic vinegar
1 tsp fresh rosemary, finely chopped

Good-quality vanilla ice cream or sweetened whipped cream

Preheat the oven to 350 F. Toss all the dry ingredients for the biscuits into your food processor and mix them up, or do it by hand in a bowl. Cut in the butter, pulsing with the food processor or crumbling into the flour mix with your fingers, until it resembles a coarse meal. Slowly add the half-and-half, and pulse or combine until it's just blended in (the dough will still be crumbly).

Pat the dough into a ball, giving it a little knead if it's not holding together, and roll it out to about an inch thick. Use a glass or biscuit cutter to cut out large rounds; brush them with a little half-and-half, and bake them for 20 minutes or until done.

Meanwhile, mix the strawberries with the honey, balsamic, and rosemary. Set aside for at least half an hour or so. When the biscuits are done, set them aside too and let them cool.

When everything's ready, split a shortcake biscuit in half and top the bottom half with the strawberry mixture. Set the top half of the biscuit on top, spoon a little extra strawberry love around the plate, and top the whole shebang with a scoop or two of vanilla ice cream or whipped cream.

Enjoy on the porch and relish the feel of a summer evening.

Wednesday, June 23, 2010

Tight-Arse Tuesdays: U-Pick


I'm heading out in a little while today to pick strawberries with a friend, and I thought - what better frugal tip for a Tight-Arse Tuesday?

'Tis the season for U-Picks, and you'll find them within 30 minutes of your location, I can almost guarantee it. If you've never done it before, it's a great way to get out in the sunshine, and teach your kids (if you have them) about nature and food. Sometimes you bring your own container, sometimes they have containers for you; once you get to the farm, just start picking until you've got more fresh-picked fruit than you know what to do with.

Strawberries are common at U-Picks, as are blueberries, tree fruits, and sometimes grapes. I've occasionally seen vegetable U-Picks but it seems to be mainly a fruit thing. Start looking for a U-Pick farm near you at PickYourOwn.org.

Of course you'll want to enjoy a lot of your fruit in its freshness, but make sure you pick extra for preserving. Homemade jams and jellies are SUPER easy, and freezing is even easier! Wouldn't it be great to toss some of your frozen strawberries into a smoothie or some fruit bread later this winter, and have the flavor transport you back to that beautiful day in June when you laughed in the sun as you picked them?

Friday, June 4, 2010

Easy delicious homemade poptarts?!

Oh man, Poptarts. I remember those things from America. They were nasty! I always liked the Toaster's Strudel better. I was sipping peppermint tea on my porch thinking longingly back to my past of the little sweet toaster pastries with more instructions than a nuclear missile (why IS that?). I thought of being a child and running with a Pop-tart in my hand towards my friends.

I lied.

Honestly, I just had way too much jam and preserves from the last few weeks of being inundated with fruit that I wanted to beat that smug look off my neighbour's face. You know the one. The one that INSISTS packaged food is the best and homemade cannot compare. I can hardly blame the woman - she is clearly suffering from brain trauma due to malnutrition since she doesn't know what food tastes like.


The "Ha-ha I'm Better Than You" Easy Peasy Wheat Poptarts

2 sticks (1c) of butter, chilled and cubed into small pieces
1 1/2c wheat flour
1 1/2c self raising
1 tsp. salt
1 tablespoon sugar
Small bowl ice water

Place butter, salt, sugar and flours in Kitchen Aid or food processor. Blitz until the little pieces resemble wet sand. Keep on low while pouring cold water a tablespoon at a time into the dough until it begins to stick together. Roll onto floured surface into equal sized disks. Refridgerate for an hour.

Flour surface of table. Measure out ten to twelve balls from each disk (use one disk at a time, the colder and more last minute, the better). Roll each ball until large rectangle. Place jam on one of the short sides, away from the edges. Fold dough over and press with fork. Place in pan, wash with eggs and sprinkle with raw sugar. Bake at 200c/400F for 15 minutes.

Tuesday, May 4, 2010

The Perfect Pie Crust (and it's gluten-free!)


I know a lot of people are cutting out gluten nowadays. I'm not on that bandwagon, but I'm always willing to try new things, and I had a hunch that gluten-free pie crust might be better than the traditional kind. I was right!

See, when you make pie crust, gluten is your enemy. The more you work the flour, the more you handle it and the more the butter melts into it, the more it glutenizes. That formation of gluten is what turns a pie crust tough and makes it turn out like bread or a cracker. All those little tricks people tell you, about keeping everything cold and handling it as little as possible and refrigerating it between every step and keeping your hands ice-cold but dry - that's all to prevent the formation of gluten. So why not just use gluten-free flours?

That's what I did, but I also kept my traditional pie-making tips. I'll give you the recipe I used, but you can also use these same techniques on a traditional pie crust recipe if you want to. They work!

THE BEST (AND EASIEST) GLUTEN-FREE PIE CRUST

1 3/4 cup brown rice flour
1/4 cup tapioca flour
1/4 cup arrowroot
1/2 tsp salt
2 Tbsp confectioners' sugar
1 tsp cinnamon, 1/2 tsp nutmeg, 1/4 tsp cloves (all optional)
3/4 cup butter, frozen
1 egg
1 Tbsp apple cider vinegar
5-6 Tbsp ice water

Mix the dry ingredients together thoroughly. Then grate the butter with a cheese grater, or cut it up into small cubes, and add it in. If you have a food processor, pulse it all together until it looks like coarse sand; if you don't, get in there with your fingers and crumble the butter in. (This can be very relaxing on a stressful day.)

Beat the egg and vinegar together, and pour into the flour-butter mix. Don't skip the cider vinegar, whatever recipe you're using! You can cut back on the water by 1 Tbsp so it balances out, but the cider vinegar is a big secret for perfect pie. Stir the liquid in slightly with a fork (or pulse in the processor) until it's mostly even, and then add the ice water just a tablespoon or two at a time, mixing (or pulsing) after each addition. Eventually it'll be a nice dough - not sticky, not springy. It'll be crumbly, but when you roll it into a ball it will hold its shape, like this:


So divide it into two parts, one slightly bigger than the other, and roll each into a ball.

At this point you would normally refrigerate the dough for awhile, giving it a chance to rest and dragging out the time it takes to make a pie by hours or a day. Fie, says I. Now you don't have to. You can roll it out right the heck now. Take it over to the table, unless you're really tall, because it's hard to get the right leverage for rolling out a crust on the countertop.

Some people say to roll out pie crust on wax paper. I don't do this or recommend it, because I always find that it tears up into little pieces, which get embedded in the pie, and it's a pain in the ass to remove them. So I like parchment paper, but when I don't have any on hand (like today), I use plastic wrap. Whichever you're using, spray a little water on the table and spread the paper/plastic over it - the water will hold it in place so it doesn't slide around when you roll it.

Drop the bigger of the two doughballs on top, cover it with another sheet of paper/plastic, and get to rolling. Change direction every so often so you get a nice big circle. You want it REALLY thin, so keep going until it's a huge thin circle. Peel off the top paper/plastic. Then put the pie plate on top of the crust, upside-down. Slide your hand underneath and flip the whole thing over carefully. Now smooth the crust over the inside of the pie plate, making sure that it's sitting nicely against the sides and bottom and hanging over the edges. Carefully peel off the paper/plastic, like so:


It might rip as you go. That's fine. Pinch it back together. No one's going to notice or care. The great thing about gluten-free pie crust is the fact that you can't overwork it!

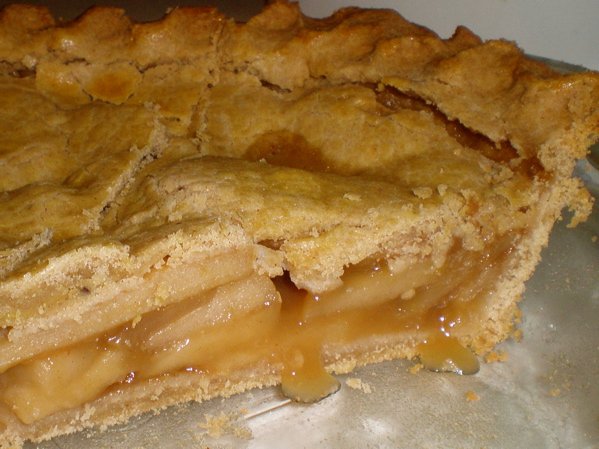
Now repeat the process with that other doughball, which will be your top crust. When it's rolled out all nice and thin, put your filling in the bottom crust - in this case an apple-pie filling I made back in October and froze in a pie plate so that it would be the right size and shape to just plunk down in the crust without thawing.


Once the pie is filled, carefully lay the top crust over it and peel the bottom layer of paper/plastic off like you did before. Then seal the crust by crimping around the edges - hold your two index fingers horizontally, facing each other, and make a little V by pushing each one in. Once it's crimped, trim the excess off the edges, so it looks like this:


At this point I highly recommend brushing some beaten egg on top. It's not necessary, but it'll give you a nice golden crust with texture. And if you're adding a decoration (about which more in a minute), it'll help it stick.


Now for decor! You've got that big heap of trimmings right there, after all. I usually like to take some of those trimmings and make a little ornament to go on the crust. Since this is an apple pie, I made an apple. I've also made hearts, stars, and other easy-to-cut-out little shapes. If you're not inclined to do this, don't bother, it isn't necessary.

What you do need to do now is cut some vents. This can just be a couple of slits, it can be an X, or you can make a little star-type design with the vents like I did.


Another optional thing - I recommend sprinkling the whole pie with a bit of sugar here. It gives the crust a bit of texture, and an appealing, rustic look that kind of sparkles when the pie is done. You don't need much, just a teaspoon or so (I never measure it, I just grab some sugar in my fingers and give it a good dusting).

Now you're ready to bake. This is going to vary depending on your filling, but with a fruit pie I start out with the oven at 450 F. I bake it for 15 minutes, then lower the heat to 350 F and continue baking for another 45 minutes. That shock of hard heat at the beginning is what melts the butter and creates little air pockets which result in a nice flaky crust.

When the pie is done, let it cool, or the inside filling may be runny. It's most delicious while still just a bit warm though!


Heavenly.

Friday, April 2, 2010

Pity the Fool!


What better day than April Fool's Day to make a nice and tasty fool?

This British dessert is a great way to showcase seasonal fruits. Usually, the fruit is pureed and then blended with whipped cream and egg whites to give it a fluffy, mousse-like texture. Occasionally the fool is then layered with cake or pastry to dress it up.

Jamie Oliver has a better version in his excellent book Jamie At Home. I made it recently to celebrate the delicious rhubarb which is so abundant right now, and I found this recipe as quick and easy at it was delicious. It got rave reviews at our table, especially from guests who had never had rhubarb before. And it came together so quickly and easily that I was still able to enjoy hanging out with my guests.

By the way, if you don't already have a copy of Jamie At Home, you need to get one. It's all about fresh, simple food made from homegrown ingredients, and it includes gardening tips, seasonal cooking, and even a chapter on wild game. The photography is so sensuous it borders on the pornographic, and the writing style makes it the kind of cookbook you can curl up to read on a rainy day. And, as you will see here, the recipes are fantastic.


JAMIE OLIVER'S SPEEDY RHUBARB FOOL

For the rhubarb compote:
1 lb rhubarb, trimmed and chopped
1/3 cup sugar or vanilla sugar *
Juice of 1/2 an orange **

For the wafers:
3 Tbsp confectioner's sugar
1 tsp ground cinnamon
Piece of frozen puff pastry

For the flavored yogurt:
2 cups plain yogurt
zest of 1 orange
1 heaped tablespoon honey

* I used 1/3 cup sugar plus 1 tsp vanilla; next time, I will substitute 1/4 cup honey.
** I used all the juice of the whole orange just because I wanted to.

Jamie says: "Get yourself a small pan and throw in the rhubarb, sugar and orange juice. Put a lid on top, bring to the boil for a couple of minutes, then remove the lid and simmer for a few more minutes until you get a thick compote consistency."

Meanwhile, sift the confectioner's sugar and cinnamon onto a clean countertop. Cut 4 slices about 1/2" thick from the puff pastry, then roll each slice out to 1/4" thick, turning it over a few times as you go so that it gets coated in the sugar and cinnamon. Cut the strips in half so you have long triangles, then fry those triangles in a hot dry skillet until golden brown on both sides. Cool them on a rack.

Mix the yogurt, honey, and orange zest together in a bowl. You can do this ahead of time and keep it chilled; you can also make the compote and pastry triangles ahead of time too and just assemble when you're ready to serve dessert. To serve, glop some yogurt onto a small plate or into a pretty glass bowl, then top it off with some rhubarb and pastry, and repeat the layers.


Welcome to April, Fool!

Saturday, March 20, 2010

Farm-Fresh Friday: Raw Milk

Now that spring is here, 'tis the season for sweet fresh milk - straight from the cow (or goat), unprocessed, just as nature intended it!

If you're horrified by the idea of unpasteurized milk, let me point out the difference between farm and factory. In a factory farm, dairy cows are crammed into a modified feedlot, fed on a diet rich in corn. Ruminants like cows did not evolve to eat grain, so while the corn does boost their milk production, it also makes them vulnerable to the diseases that fester in the filthy conditions. The corn in their diet is rounded out with cheap non-food fillers, which not only abuses the cows but also makes the milk taste nasty. (This is why no one pours a glass of milk to drink anymore.) On a good farm, on the other hand, a manageable number of cows will live on grass (or hay in winter), soaking up the sunshine and clean fresh air that keeps them healthy.

Science has discovered that two weeks of a grass diet completely eliminates E. coli from a sick cow's digestive tract. Yep, all of it. No further processing needed on the E. coli front. But of course it's better if they don't get sick in the first place.

Pasteurization, therefore, is necessary in a factory system where the milk is diseased, infectious, and full of nastiness you really don't want to read about over breakfast. This is why mandatory pasteurization almost immediately followed the birth of the modern corn-based feedlot. It is not so necessary with farm-fresh milk. What's worse, pasteurization destroys vital nutrients and robs the milk of almost all of its health benefits.

Remember when every other kid didn't have asthma or lethal allergies? I know, those days seem more and more like ancient history, writ with every kindergartener's EpiPen. But it appears as though raw milk boosts the immune system better than anything out there, preventing or even curing allergies, asthma, and other immune disorders. It has other benefits too - you can read about them here.*

If you're lactose intolerant and think you can't drink milk, surprise! Raw milk has an enzyme built into it, called lactase, which helps to break down lactose; this enzyme is replicated in the Lactaid product you get at the store. Pasteurization destroys milk's natural lactase, but it's there in raw milk and it will do the work of breaking down lactose so you can digest it easily. Many people who are intolerant to pasteurized milk can drink raw milk without a problem.

"But I don't like milk," you say. If I may say so, you haven't had milk until you've had it raw. The flavor is so much sweeter; it tastes like rich, creamy sunshine. I love the joy of getting up the morning after we make our milk buy, and the cream sits in a thick layer in the top of the jar, with the smooth milk underneath it. I like the fresh cream in my coffee, but it's also good to cook into desserts and occasionally I make cultured butter with it. My husband and I like to drink the milk itself after a workout - it's got just the right combination of proteins, healthy fats, and complex carbohydrates to rebuild our muscles and replenish our energy.

To answer a common question, raw milk usually keeps in the refrigerator for a week or two. When it starts to turn and it's not good to drink anymore, you can still use it. Pasteurized milk goes rancid, but raw milk just cultures with the beneficial bacteria living in it (those "probiotics" you hear so much about). You can make sour cream or creme fraiche from the cream, and from the milk you can make yogurt or kefir. You can cook with it in soups when it starts to go off, or bake with it as you would buttermilk. Yesterday I used up some slightly-off raw milk in a cheesy sauce for cauliflower au gratin. So unlike processed milk, there's no waste with living milk!

If you thought raw milk was illegal, you can be excused for thinking that. In most areas, however, it isn't. Availability varies by state (and country). In some areas, you can buy it in certain stores; in most areas, you have to purchase it directly from the farm. Many farms cater to buying clubs, where members take turns making the drive out to the farm to bring the milk into town so everyone can pick it up locally. We just enjoy a pleasant drive to the country every week or so; it takes about an hour to make the trip, and the scenery is gorgeous.

You can find out where to buy raw milk at this link.

As for the other common objection - yes, it costs a little more. But at what price your health? My grandmother always says she'd rather have a big grocery bill than a big doctor bill, and it really does work out to be one or the other. In the 1950's we spent about 19% of our income on groceries and about 9% on health care; today those proportions are almost exactly reversed. There is a direct correlation between one and the other, and besides, healthy food is more delicious anyway. I know I'd rather spend my money on sweet, fragrant, tasty milk and farm-fresh foods than asthma inhalers (which I used to shell out $150/month for and now no longer need).

So find a farm near you, preferably one with Jersey cows because the milk is richer and more filling. (We only need 4 oz at a time when we drink it.) Then pour yourself a nice glass of living, probiotic, nutrient-dense milk and toast: To Your Health!

* (Of course there are some who are so immunocompromised or have other issues which preclude the consumption of untreated animal products, so avoid them if this is you, but the trick is to avoid getting into that situation in the first place whenever possible.)

Thursday, March 4, 2010

Vanilla-Coffee Gelato: No Ice Cream Maker Necessary!


I put this together last year when I had a brunch at my apartment and we didn't finish the huge pot of coffee I brewed. I couldn't bring myself to pour all that fresh-ground deliciousness down the sink, and I didn't have any blueberry bushes to pour it on then (now I do!), so I fell back on my favorite coffee ice cream.

I don't have an ice cream maker yet, though I hope to get one this summer. I also wanted to keep things reasonably light - not too sugary, not too rich - so I tried a freezer gelato and it worked out beautifully!

If you don't have a vanilla bean, then just use a teaspoon of vanilla extract, but I highly recommend obtaining a vanilla bean for this if you can. It makes a world of difference in the flavor, and the little specky vanilla seeds give the gelato a lot of character.

VANILLA-COFFEE GELATO

3 egg yolks (save the whites and scramble them up for breakfast later)
1/4 cup brown sugar
1/4 cup honey
1 cup milk
1 cup coffee (day-old and strong, if possible)
1/2 a vanilla bean

Bring a pot of water to a boil. In a non-plastic bowl that fits over the boiling water pot, combine egg yolks, brown sugar, and honey; beat well until bubbles form. Beat in the milk, then the coffee, until it's all well-combined. Split the half vanilla bean open lengthwise, then carefully scrape out the seeds into the mixture and drop the bean in too. Give it a good stir.

Set the bowl over the boiling water and cook, stirring often, until it thickens into a custard. Make sure you scrape the bottom as you stir! You don't want to cook the custard to the bowl. Once you've got your thick custard, remove the vanilla bean and pour the custard into a freezer-safe container and stick it in the freezer.

About every half hour or so, stir it up with a fork. It will take a few hours to freeze but you only need to stir it for a minute to break up the ice forming. When it's frozen, check to see if it's icy; if it is, break it up into chunks and dump them into the blender for a quick whirl. The blender will break up the ice and you can re-freeze it all you want after that without needing to blend it again. It'll stay nice and gelato-ey in the freezer now - if, of course, you don't gobble it up right away.

Which you will.


Saturday, February 6, 2010

Farm-Fresh Friday: Rosemary Jelly


Canning season is still months away - trust me, you'll hear a lot more from me on that front as the fruit starts coming in this summer. But that doesn't mean you can't have loads of fun making jars of prettythings now! I discovered rosemary jelly this year and I absolutely love it.

This goes beautifully on a sandwich with a little cheese, or thinned with a bit of apple juice and brushed over chicken or pork, or in place of mint jelly with lamb. It's sweet, but the rosemary gives it a nice herbal twist that makes it perfect for savory dishes.

ROSEMARY JELLY

1 cup boiling water
3 Tbsp fresh rosemary
2 cups sugar
1/4 cup vinegar
1 pkg liquid pectin
Green food coloring (optional)

Pour the boiling water over the fresh rosemary in a bowl. Cover and let stand for a half hour or so.

Strain the liquid into a pan, add sugar and vinegar, and bring to a rolling boil. Add the pectin, and boil another minute or two, then take off the heat. Add a drop or two of food coloring if you want. Pour into sterilized jars, and process in a boiling water bath for 10 minutes if you want. If not, let the jars cool overnight at room temperature and then store in the fridge once set.


Saturday, January 16, 2010

Farm-Fresh Friday: Peach Cobbler!

Homemade Peach Cobbler served with Homemade Mango Icecream - using mangos from the family farm!
(recipe for Mango Ice Cream to come at later date!)

It's summer in Australia, which means even though I used an America recipe (holy cow you guys like your sugar!) you're going to have to wait 6 more whole months before you can make this, unless you're lucky enough to live on the Southern Hemisphere like me.

Backstory: I was once a housewife in America, for a short period of my life. My mother in law, who hated me like usual, would always make me peach cobbler when I came by. Her version was this terrible concoction of canned peaches poured into a baking tin, covered in cake mix, with slices of cold butter thrown on top and then thrown into the oven, as is.

As I've grown on in years, I've come to discover that peach cobbler from scratch is really not much harder at all. Melt the butter, some flour, some sugar. Stir it all up and bake some peaches on top, really. So I dedicate this to my ex-mother-in-law who liked to pretend she lived in a farm but really just had several acres of land she did nothing to.

4oz of butter (see, American!) or 1 stick or 100~110 grams butter, melted
1 cup sugar
1 cup flour
2tsps baking powder
one grind of salt
1 cup milk
1 tsp vanilla extract*
4 ripe white peaches (though I used red and white, I found the white tastier, sturdier and fresher for this recipe, so I'd omit the red and just use all white - learn from my "mistakes")
1/2 tsp cinnamon

Preheat oven to 180/350/Gas Mark 4.

I love this recipe because I don't TECHNICALLY have to measure anything or remember much. Equal parts all main ingredients (even 4 ripe peaches is about a cup of peaches). Except butter, which is half a cup about. Normally I work with weight, so this is a fun experiment for me.

Put melted butter in bottom of baking dish. Put all dry ingredients in mixing bowl and combine. I just use my hand for this. No point in dirtying a spoon or anything until you get the milk and vanilla extract in here.

There's a tiny star by the vanilla extract. Why is this? Oh yes, because I don't use vanilla extract, technically. I use this:What is this? Well, it's a bottle of vodka. With vanilla beans in it. The vodka is considered a nice brand locally, but I have done this with both expensive and cheap brands of vodka and the results have pretty much been the same. I was just testing the more expensive vodka and while the tang is a bit less, it has roughly the same flavour. It is very similar to vanilla extract, but incredibly cheaper. This bottle, while expensive at $40, holds 700mL of vodka. The beans were $3 each and this is now their THIRD bottle of vanilla extract, so let's say they were $1 a piece (also, I wouldn't go past 3 uses with these beans. As you can see, my extract is not as dark as normal). $42 for 700mL of extract... or $6 for 60mL of extract at the grocery store? See my point? That's about $25 difference using expensive vodka! Use cheaper vodka (which is even CHEAPER in America!) at $20 a bottle, and you're saving TONS on vanilla extract. Plus you have vanilla vodka on hand for any delicious occasion!

Now back to the recipe. Pour the batter over the butter and then slice the peaches on top. Sprinkle cinnamon over entire thing and bake for 25-30 minutes.

Now eat with a large glass of vanilla vodka to wash it down!