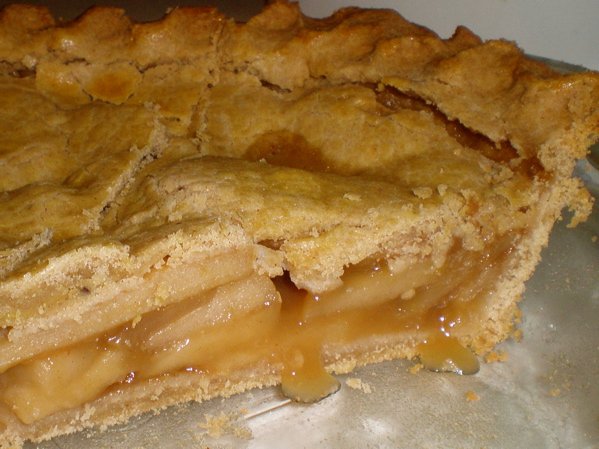
I know a lot of people are cutting out gluten nowadays. I'm not on that bandwagon, but I'm always willing to try new things, and I had a hunch that gluten-free pie crust might be better than the traditional kind. I was right!
See, when you make pie crust, gluten is your enemy. The more you work the flour, the more you handle it and the more the butter melts into it, the more it glutenizes. That formation of gluten is what turns a pie crust tough and makes it turn out like bread or a cracker. All those little tricks people tell you, about keeping everything cold and handling it as little as possible and refrigerating it between every step and keeping your hands ice-cold but dry - that's all to prevent the formation of gluten. So why not just use gluten-free flours?
That's what I did, but I also kept my traditional pie-making tips. I'll give you the recipe I used, but you can also use these same techniques on a traditional pie crust recipe if you want to. They work!
THE BEST (AND EASIEST) GLUTEN-FREE PIE CRUST1 3/4 cup brown rice flour
1/4 cup tapioca flour
1/4 cup arrowroot
1/2 tsp salt
2 Tbsp confectioners' sugar
1 tsp cinnamon, 1/2 tsp nutmeg, 1/4 tsp cloves (all optional)
3/4 cup butter, frozen
1 egg
1 Tbsp apple cider vinegar
5-6 Tbsp ice water
Mix the dry ingredients together thoroughly. Then grate the butter with a cheese grater, or cut it up into small cubes, and add it in. If you have a food processor, pulse it all together until it looks like coarse sand; if you don't, get in there with your fingers and crumble the butter in. (This can be very relaxing on a stressful day.)
Beat the egg and vinegar together, and pour into the flour-butter mix. Don't skip the cider vinegar, whatever recipe you're using! You can cut back on the water by 1 Tbsp so it balances out, but the cider vinegar is a big secret for perfect pie. Stir the liquid in slightly with a fork (or pulse in the processor) until it's mostly even, and then add the ice water just a tablespoon or two at a time, mixing (or pulsing) after each addition. Eventually it'll be a nice dough - not sticky, not springy. It'll be crumbly, but when you roll it into a ball it will hold its shape, like this:

So divide it into two parts, one slightly bigger than the other, and roll each into a ball.
At this point you would normally refrigerate the dough for awhile, giving it a chance to rest and dragging out the time it takes to make a pie by hours or a day. Fie, says I. Now you don't have to. You can roll it out right the heck now. Take it over to the table, unless you're really tall, because it's hard to get the right leverage for rolling out a crust on the countertop.
Some people say to roll out pie crust on wax paper. I don't do this or recommend it, because I always find that it tears up into little pieces, which get embedded in the pie, and it's a pain in the ass to remove them. So I like parchment paper, but when I don't have any on hand (like today), I use plastic wrap. Whichever you're using, spray a little water on the table and spread the paper/plastic over it - the water will hold it in place so it doesn't slide around when you roll it.
Drop the bigger of the two doughballs on top, cover it with another sheet of paper/plastic, and get to rolling. Change direction every so often so you get a nice big circle. You want it REALLY thin, so keep going until it's a huge thin circle. Peel off the top paper/plastic. Then put the pie plate on top of the crust, upside-down. Slide your hand underneath and flip the whole thing over carefully. Now smooth the crust over the inside of the pie plate, making sure that it's sitting nicely against the sides and bottom and hanging over the edges. Carefully peel off the paper/plastic, like so:

It might rip as you go. That's fine. Pinch it back together. No one's going to notice or care. The great thing about gluten-free pie crust is the fact that you can't overwork it!
Now repeat the process with that other doughball, which will be your top crust. When it's rolled out all nice and thin, put your filling in the bottom crust - in this case an apple-pie filling I made back in October and froze in a pie plate so that it would be the right size and shape to just plunk down in the crust without thawing.

Once the pie is filled, carefully lay the top crust over it and peel the bottom layer of paper/plastic off like you did before. Then seal the crust by crimping around the edges - hold your two index fingers horizontally, facing each other, and make a little V by pushing each one in. Once it's crimped, trim the excess off the edges, so it looks like this:

At this point I highly recommend brushing some beaten egg on top. It's not necessary, but it'll give you a nice golden crust with texture. And if you're adding a decoration (about which more in a minute), it'll help it stick.

Now for decor! You've got that big heap of trimmings right there, after all. I usually like to take some of those trimmings and make a little ornament to go on the crust. Since this is an apple pie, I made an apple. I've also made hearts, stars, and other easy-to-cut-out little shapes. If you're not inclined to do this, don't bother, it isn't necessary.
What you do need to do now is cut some vents. This can just be a couple of slits, it can be an X, or you can make a little star-type design with the vents like I did.

Another optional thing - I recommend sprinkling the whole pie with a bit of sugar here. It gives the crust a bit of texture, and an appealing, rustic look that kind of sparkles when the pie is done. You don't need much, just a teaspoon or so (I never measure it, I just grab some sugar in my fingers and give it a good dusting).
Now you're ready to bake. This is going to vary depending on your filling, but with a fruit pie I start out with the oven at 450 F. I bake it for 15 minutes, then lower the heat to 350 F and continue baking for another 45 minutes. That shock of hard heat at the beginning is what melts the butter and creates little air pockets which result in a nice flaky crust.
When the pie is done, let it cool, or the inside filling may be runny. It's most delicious while still just a bit warm though!

Heavenly.


 This is the time mise-en-place is incredibly important; have everything prepared and set aside in advance!!! You'll want: 1 tsp of bicarb, sifted twice, a prepared pan with wax paper that you've put a little extra grease on, some water, a pastry brush and a baking mitt.
 Once it has started boiling, whisk as much as possible. You want to incorporate as many bubbles as possible to make a nice holey honeycomb.
 Wait 15 minutes. Don't touch it in this time. I did and mine flattened a little. Break up with a knife. ENJOY!