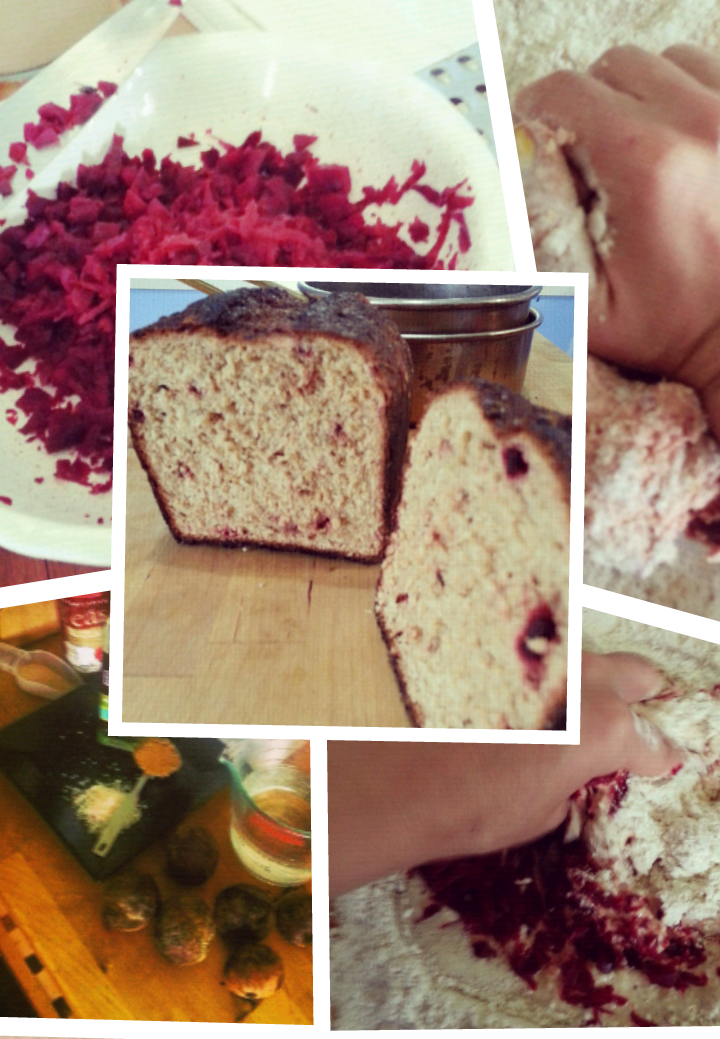
I've been moving and it's been hard on my poor vegetables! After the move I found some horrible wilted beetroot (beets for you Americans) looking sad in the back of the pantry. This is a good recipe for that. Simply steam the old sad beetroot until soft and trim all the wrinkly bits off. If you have chickens you can be quite vicious with what you take away. Shred it all until you have about a cup of beetroot. Since the end of a beetroot can't be sliced by my mandolin, I made chunks with the last bits with my knife. That way I got no waste. Otherwise if you don't want chunks, simply just use the shredded beetroot!
Combine 3/4c water and 7g or two and a quarter teaspoons dry yeast with one tablespoon sugar. This will help you figure if your yeast is any good. Do this before you chop your beetroot and by the time you're done it should be foaming.
Throw four cups of flour onto a work surface (if you have problems cleaning up a paint scraper from a hardware store is a wonderful thing) and make a well in the centre that has high sides.
Put the beetroot in the well with a good handful of salt, about 10g or two tablespoons of coarse kosher or river salt (I use pink river). Becuase bread is so light and has so much flavourless flour, it needs more salt than you think. This, however, will nearly always be less salt than a traditional purchased loaf contains.
Also add two tablespoons of oil.
Pour the foam water slowly as you stir with your fingers of the other hand. Push up the sides to make sure the water doesn't spill over the edge. If you work your way outwords, your loaf will not pick up more flour than it needs. If your beetroot is extra wet, you might need up to another cup. It should be slightly sticky so if it is just keep kneading. Eventually the texture of the dough will seem stretched, dull and springy. When it suddenly transforms into what looks and smells exactly like what you think it should (the bakery smell will start filling your house already!) you are done. It should take about ten minutes. If you have problems kneading, stand on a step stool or chair - the weight from above is more important the actual hand motions.
Put in oiled bowl and raise 45 minutes. Punch the double inflated dough (if it's not double, wait a little longer) down into the bowl and make a new ball of dough and let sit until doubled again.
Turn on the oven to as high as it goes. Prepare a glass of water. If you have a gas oven, put a lipped sheet pan on the base of your oven.
Punch down and form loaf. I like my loaf tins so I use those.
This is where you can choose your decor. Do you like the basic simplicity of a flour lined crust? Do you prefer a shiny flaky crust? A crisper crust is made by oiling the pan before putting your loaf in and then using an egg wash (bit of egg and water) over the top. A more rustic loaf can be made by putting flour down on the pan (a tiny amount of oil brushed up the sides first) and the top floured.
Let raise until double. When it's half rises, cut a big slice into the top. I like to do it early because I love the appearance of it. Otherwise do it later and you'll get those nice thin lines. Should be another half hour to rise.
Yes, three rises. This will nearly always guarantee a fluffy loaf if you knead properly and have a hot oven. Trust me and you will ALWAYS take that extra step because thw guarantee is WORTH it. Nothing worse than all that work and flour just to have a sad flat loaf.
Put the loaf in the oven and toss the water into the bottom. Make sure not to hit the pilot light or flame if you're on gas!
Immediately turn down to 180°c or 350°F. Let cook five minutes less than I did. See how I burnt the edges? Don't do that. I just moved!! This is proof though that oven times can differ depending on your oven. After half an hour, check on it and see if its nice and golden on the outside and springy to the touch (touch quickly!). You won't know 100% by eye until you're used to bread but otherwise when it appears as done as you want it (30-45) flip it upside down and flick it. If it sounds nice and hollow, you have bread!